SEO Version


I
,
J
(Q
I
2.
3.
ACCEPT
REJECT
4.
OUTLET
OUTLETS
5.
6.
OPERATION AND ADJUSTMENTS
A selector should never be oiled.
Every selector has Q permanent
mognel which lends to pick up
steel filings.
Spore units should, therefore,
be wropped or bogged.
In. case of d.iHi cu Ily, fi rst make certo in that you have refered
to the instruction
s
for you r PQrticu Ior 'Selector and then foHow
the instructions step by step.
In the event of a malfunction of the selector,
proceed as follows:
1.
Remove the sel eclo r from the vendor.
2.
Open the SCQvenger (.it is hi nged
of
the r ighl side) ond in-
spect it for cleon I iness.
If there is
the
least doubt os
10
i
Is cleanl
iness,
follow the cl eon; ng procedure out Iined in
this monual.
3.
Chec k a II screws for Ii ghtness.
4.
Stond the sel
ecter
upr; gh
t
on
0
Ievel surface and in serf
coins.
Observe whelher the coins are accepted,
rejected,
0 1
lodged in the selector.
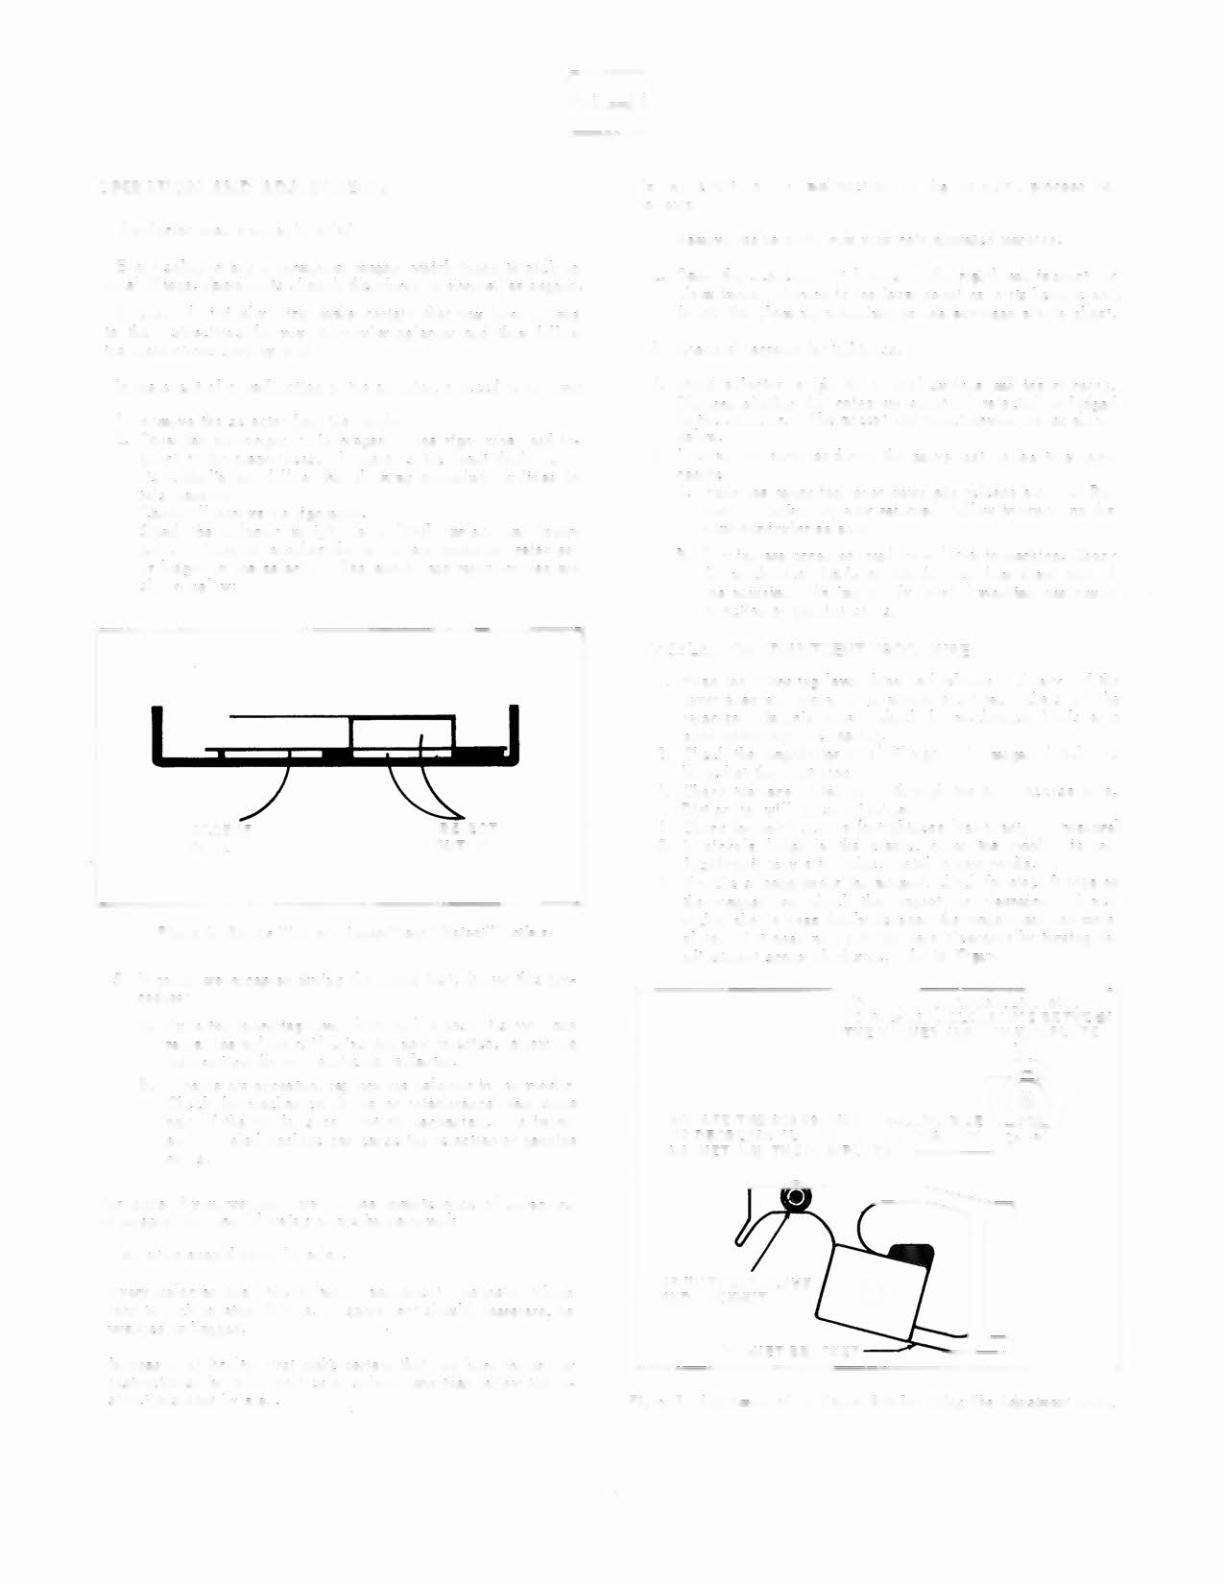
The accept ond reject chutes ore
shown below;
Figure 6.
Bottom
Viewof "Ac cept" ond "Re ;e ct" Outlets.
5.
If coins (Ire accepted during the above test, follaw this pro-
cedure:
A. Push the operating lever down and release it slawly and
relesl Ihe selector;
if cains are now rejected,
lollaw the
i nslructi ans for
ya
ur
port icular selector.
B.
If coins are accepted,
rep Iace the selector in the vendar.
Check far mechanical
binds or interference lram same
port af the vendor's co in return mechan ism.
An
i
mpre-
perly leveled machine can couse the rejection al genuine
coins.
For those af yau, wha are new
10
the maintenance af seledars,
we suggest that Ihe fallowin g pal nts be observed;
A sel ectar shou Id never be oil ed.
Every selector has one
or mere
permanent
magnets which
tend to pick up steel Ii Iings.
A spare un it shou I
d,
therelare,
be
wrapped or bogged.
In case
01
difficulty,
first make certain that yau have the
proper
instructians
lor your particular selectorond then follow the in-
structions step by step.
In the evenl
01
a malfunction
01
the selector,
praceed as
lallows:
J.
Remove the selector Irom your coin operated machine.
2.
Open Ihe scavenger (it hinges fa Ihe right) ond inspect
for
c Ieanl iness.
If the re is the leosl douht as
10
its being c Ieon,
lollaw the cleaning procedure on the enclosed single sheet.
3.
Check all screws for tightness.
4.
Stand se Iector u
prl
gh t on
a
leve I surface and insert cains.
Observe whether the coins are accepted,
rejected Or lodged
in the
seleeror.
The accept and reject chutes are as shawn
below:
5.
If coins are accepted during the nbove lest, follow this
pro-
cedure:
A. Push the opera ling lever down and release slowly.
Re-
test.
If coins are now reiec:ted.
fallow instrucfions for
your particular selec.tor.
6.
If coins ore accepted,
replace selectar in machine. Check
for mechanical
binds or interference from some port of
the machine.
An imp.roperly l<1veled machine can cause
rejecti on of gen u ine ca in s.
501
SELECTOR ADJUSTMENT PROCEDURE
1.
Push the aperoting lever down and
rel
ease it slowly.
If the
l<1ver does not relurn to its normal po s
i
tion, ni eke Iswill
be
rejected.
In this event,
check for .mechanical
binds or a
weak operating lever spring.
Check the magnet far steel filings.
The magnet bracket is
hi nged at the ri ght si de.
Check the face of the anvil Ihraugh the anvil access hal e.
Dirt or lint will couse rejection.
Check the anvil screws far tightness (use plenty of pressure).
If n icke Is lodge
j
n the cradle,
cI eon the crodl e pin and
bush iog; if Ihey sf;
II
lodge, inslol J
a
new cradle.
If nickel s lodge un der the magnet, check for steel fi lin gs on
the magnet and check the magnet for cleo ron
Co l.
A new
nickel shauld pass freely hetween the magnet
end
the main·
plate.
If it does not, provide more clearance by turning the
adjustment
screw clockwise,
refer to Fi gure
7.
ROTATE THE SCREWCLOCKWISE
TO INCREASE CLEARANCE BETWEEN
THE MAGNET AND THE MAINPLATE
~
ROTATE THE SCREWCOUN.TER.CLOCKW1SEGJ
TO DECREASE CLEARANCE BETWEEN THE /-
MAGNET AND THE MAINPLATE
Figure 7. Ad;us·'meM' of
the
Magnet
Bracket
U.sing Tbe Acliustment Screw.
2
Powered by FlippingBook Publisher