Basic HTML Version


See
Detail View
--..
:=:-
;r-
.. .,
I
II
I
I I
I
II
I
I
I
-,
, I
0
L
I
-00
::m:
C-10843
Leg
8-7377
e9 Leveller
Shaft
FoOl Pad
•
PINBALL
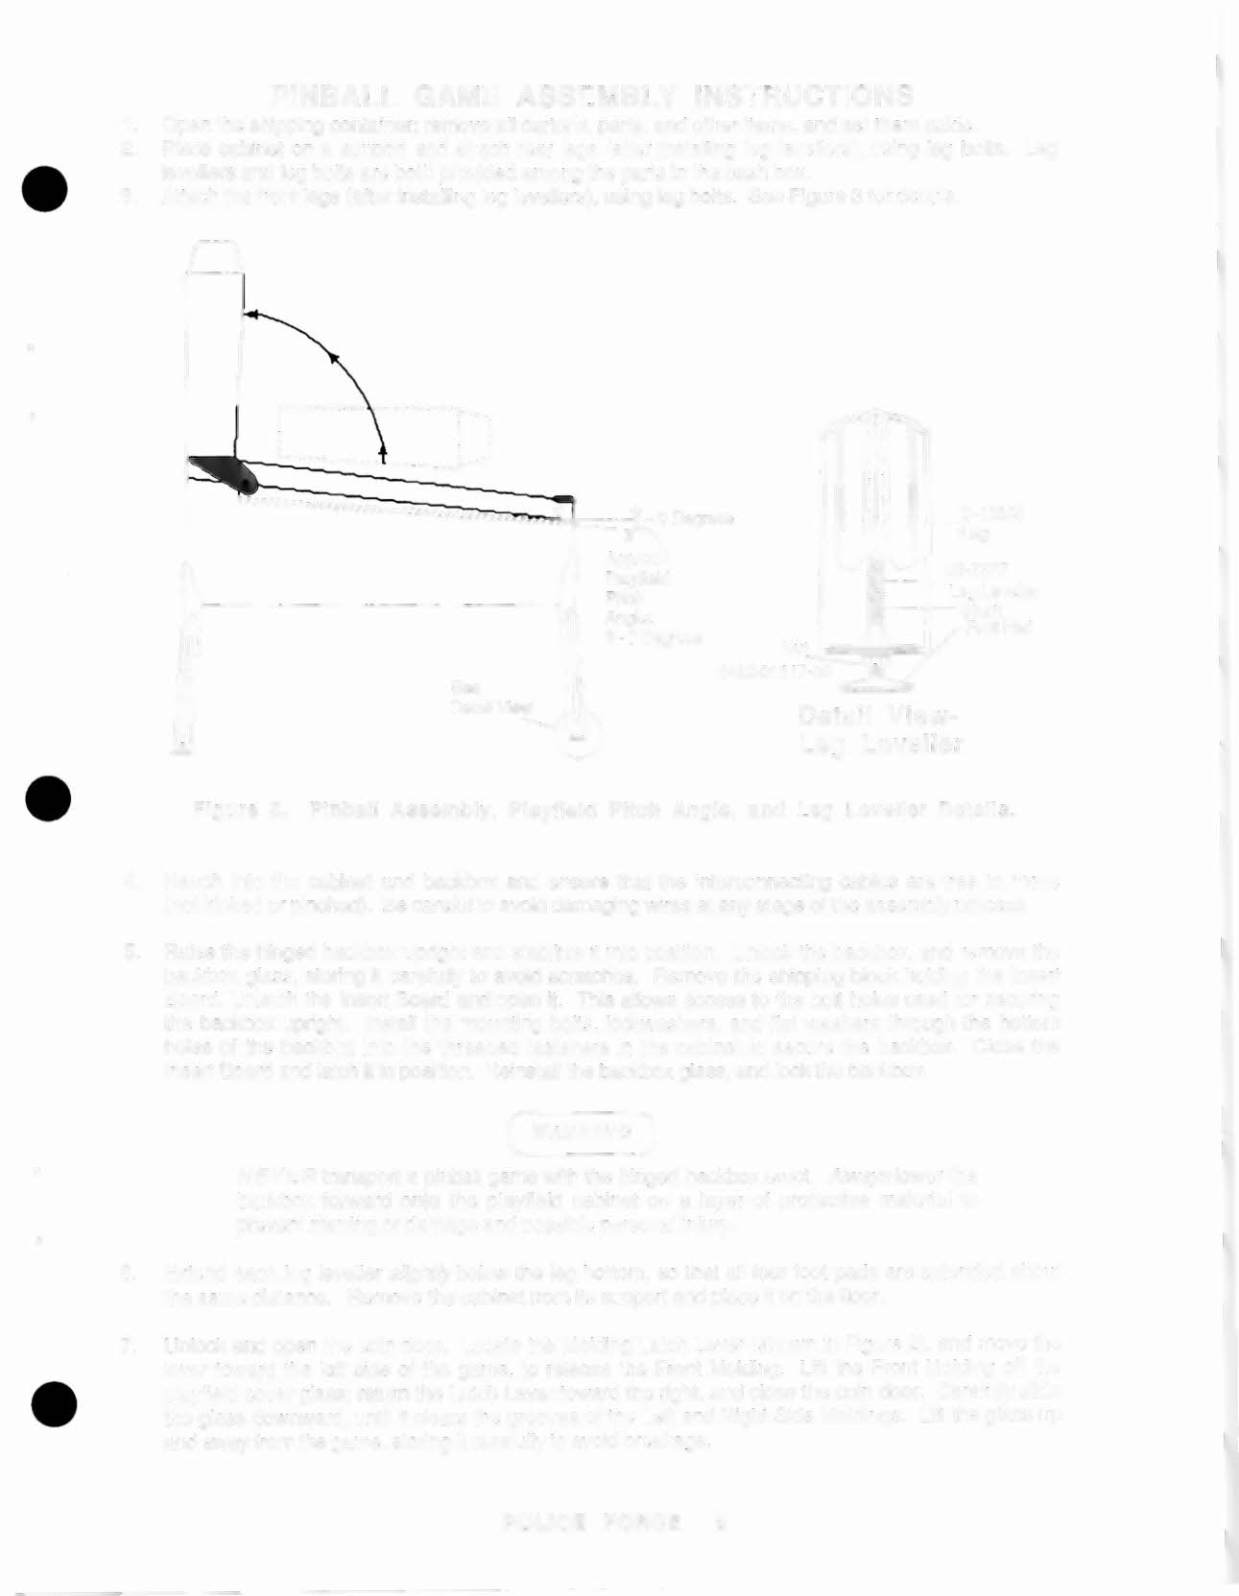
GAME ASSEMBLY INSTRUCTIONS
1. Open the shipping container; remove all cartons, parts, and other items, and set them aside.
2.
Place cabinet on a support and attach rear legs (after installing leg levellers), using leg bolts. Leg
levellers and leg bolts are both provided among the parts in the cash box .
3.
Attach the front legs (after installing leg levellers), using leg bolts. See Figure 3 for details.
r •..• • .•.•. ··_-'·-
.~ .•.•.
----
.•.••... _
I
I
-_
·
.
'
·
.
.
·
.
.
·
'
,
I
&- .•..•.......
; .•.•...
•
Nu
4422-01117
Detail View·
leg Leveller
•
Figure 3. Pinball Assemb ly. PJayfield Pitch Angle. and Leg Leveller Deta ils.
4. Reach into the cabinet and backbox and ensure that the interconnecting cables are free to move
(not kinked or pinched). Be careful to avoid damaging wires at any stage of the assembly process.
5.
Raise the hinged backbox upright and stabilize it into position. Unlock the backbox, and remove the
backbox glass, storing it carefully to avoid scratches. Remove the shipping block holding the Insert
Board. Unlatch the Insert Board and open it. This allows access to the bolt holes used for securing
the backbox upright. Install the mounting bolts, lockwashers, and flat washers through the bottom
holes of the backbox into the threaded fasteners in the cabinet to secure the backbox. Close the
Insert Board and latch it in
posincn
Reinstall the backbox glass, and lock the backbox.
( WA RNING)
NEVER
transport a pinball game with the hinged backbox erect.
Always
lower the
backbox forward onto the playfield cabinet on a layer of protective material to
prevent marri ng or damage and po ssible perso nal inju ry.
6.
Extend each leg leveller
slightly
below the leg bottom, so that all four foot pads are extended about
the same distance. Remove the cabinet from its support and place it on the floor.
•
7.
Unlock and open the coin door. Locate the Molding Latch Lever (shown in Figure 2), and move the
lever toward the left side of the game, to release the Front Molding. Lilt the Front Molding off the
playfield cover glass; return the Latch Lever toward the right, and close the coin door.
Carefully
slide
the glass downward, until it clears the grooves of the Left and Right Side Moldings. Lift the glass up
and away from the game, storing it carefully to avoid breakage.